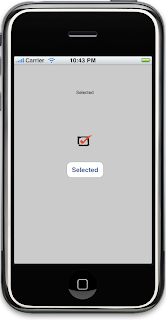
Creating a simple iPhone checkbox
I was disappointed to discover the iPhone SDK did not include a Checkbox component. Yes, I know there is the UISwitch component. But sometimes that is just to big and does not look right for your design.
After googling, I could not find a checkbox component that somebody else had made or a good tutorial. So below are the steps I did to create a simple checkbox.
I began by adding a UIButton to my view and setting its Type to custom and its background to my unchecked png image with transparent background. Then I implemented the auto generated viewDidLoad method to set my background image if the button state was selected to the checked png image.
- (void)viewDidLoad {
[super viewDidLoad];
[checkButton setBackgroundImage:[UIImage imageNamed:@"checked.png"] forState:UIControlStateSelected];
}
Finally, I attached a changeSeletected method to the button's Touch Up Inside event that changed the selected state of my button.
- (IBAction) changeSelected: (id) sender {
UIButton *button = (UIButton *) sender;
button.selected = !button.selected;
}
I think the final outcome turned out pretty nice.

출처: http://juddsolutions.blogspot.com/2009/02/creating-simple-iphone-checkbox.html
위 내용을 그대로 쓰는 것보다는(viewDidLoad 부분은 불필요)
인터페이스 빌더에서 UIButton 타입을 Custom으로 변경 후
Default 상태와 Selected 상태의 Image를 각각 등록해준 후
해당 버튼의 리스너에
UIButton *button = (UIButton *) sender;
button.selected = !button.selected;
button.selected = !button.selected;
이 코드를 사용하면 되겠다.
Tip:
인터페이스 빌더의 Drawing 에서 Highlighted Adjusts Image 항목을 선택해제하면
이미지 버튼 토글 사이에 음영처리를 지워준다.
'프로그램 > iPhone' 카테고리의 다른 글
| iPhone - combobox (0) | 2011.01.12 |
|---|---|
| tableView에서 페이지 (0) | 2011.01.12 |
| 키보드 확장: 키보드에 툴바 추가하기 2 (0) | 2011.01.10 |
| 아이폰용 오픈소스/예제/참고자료 모음 (0) | 2011.01.04 |
| how to debug EXC_BAD_ACCESS on iPhone (0) | 2011.01.03 |